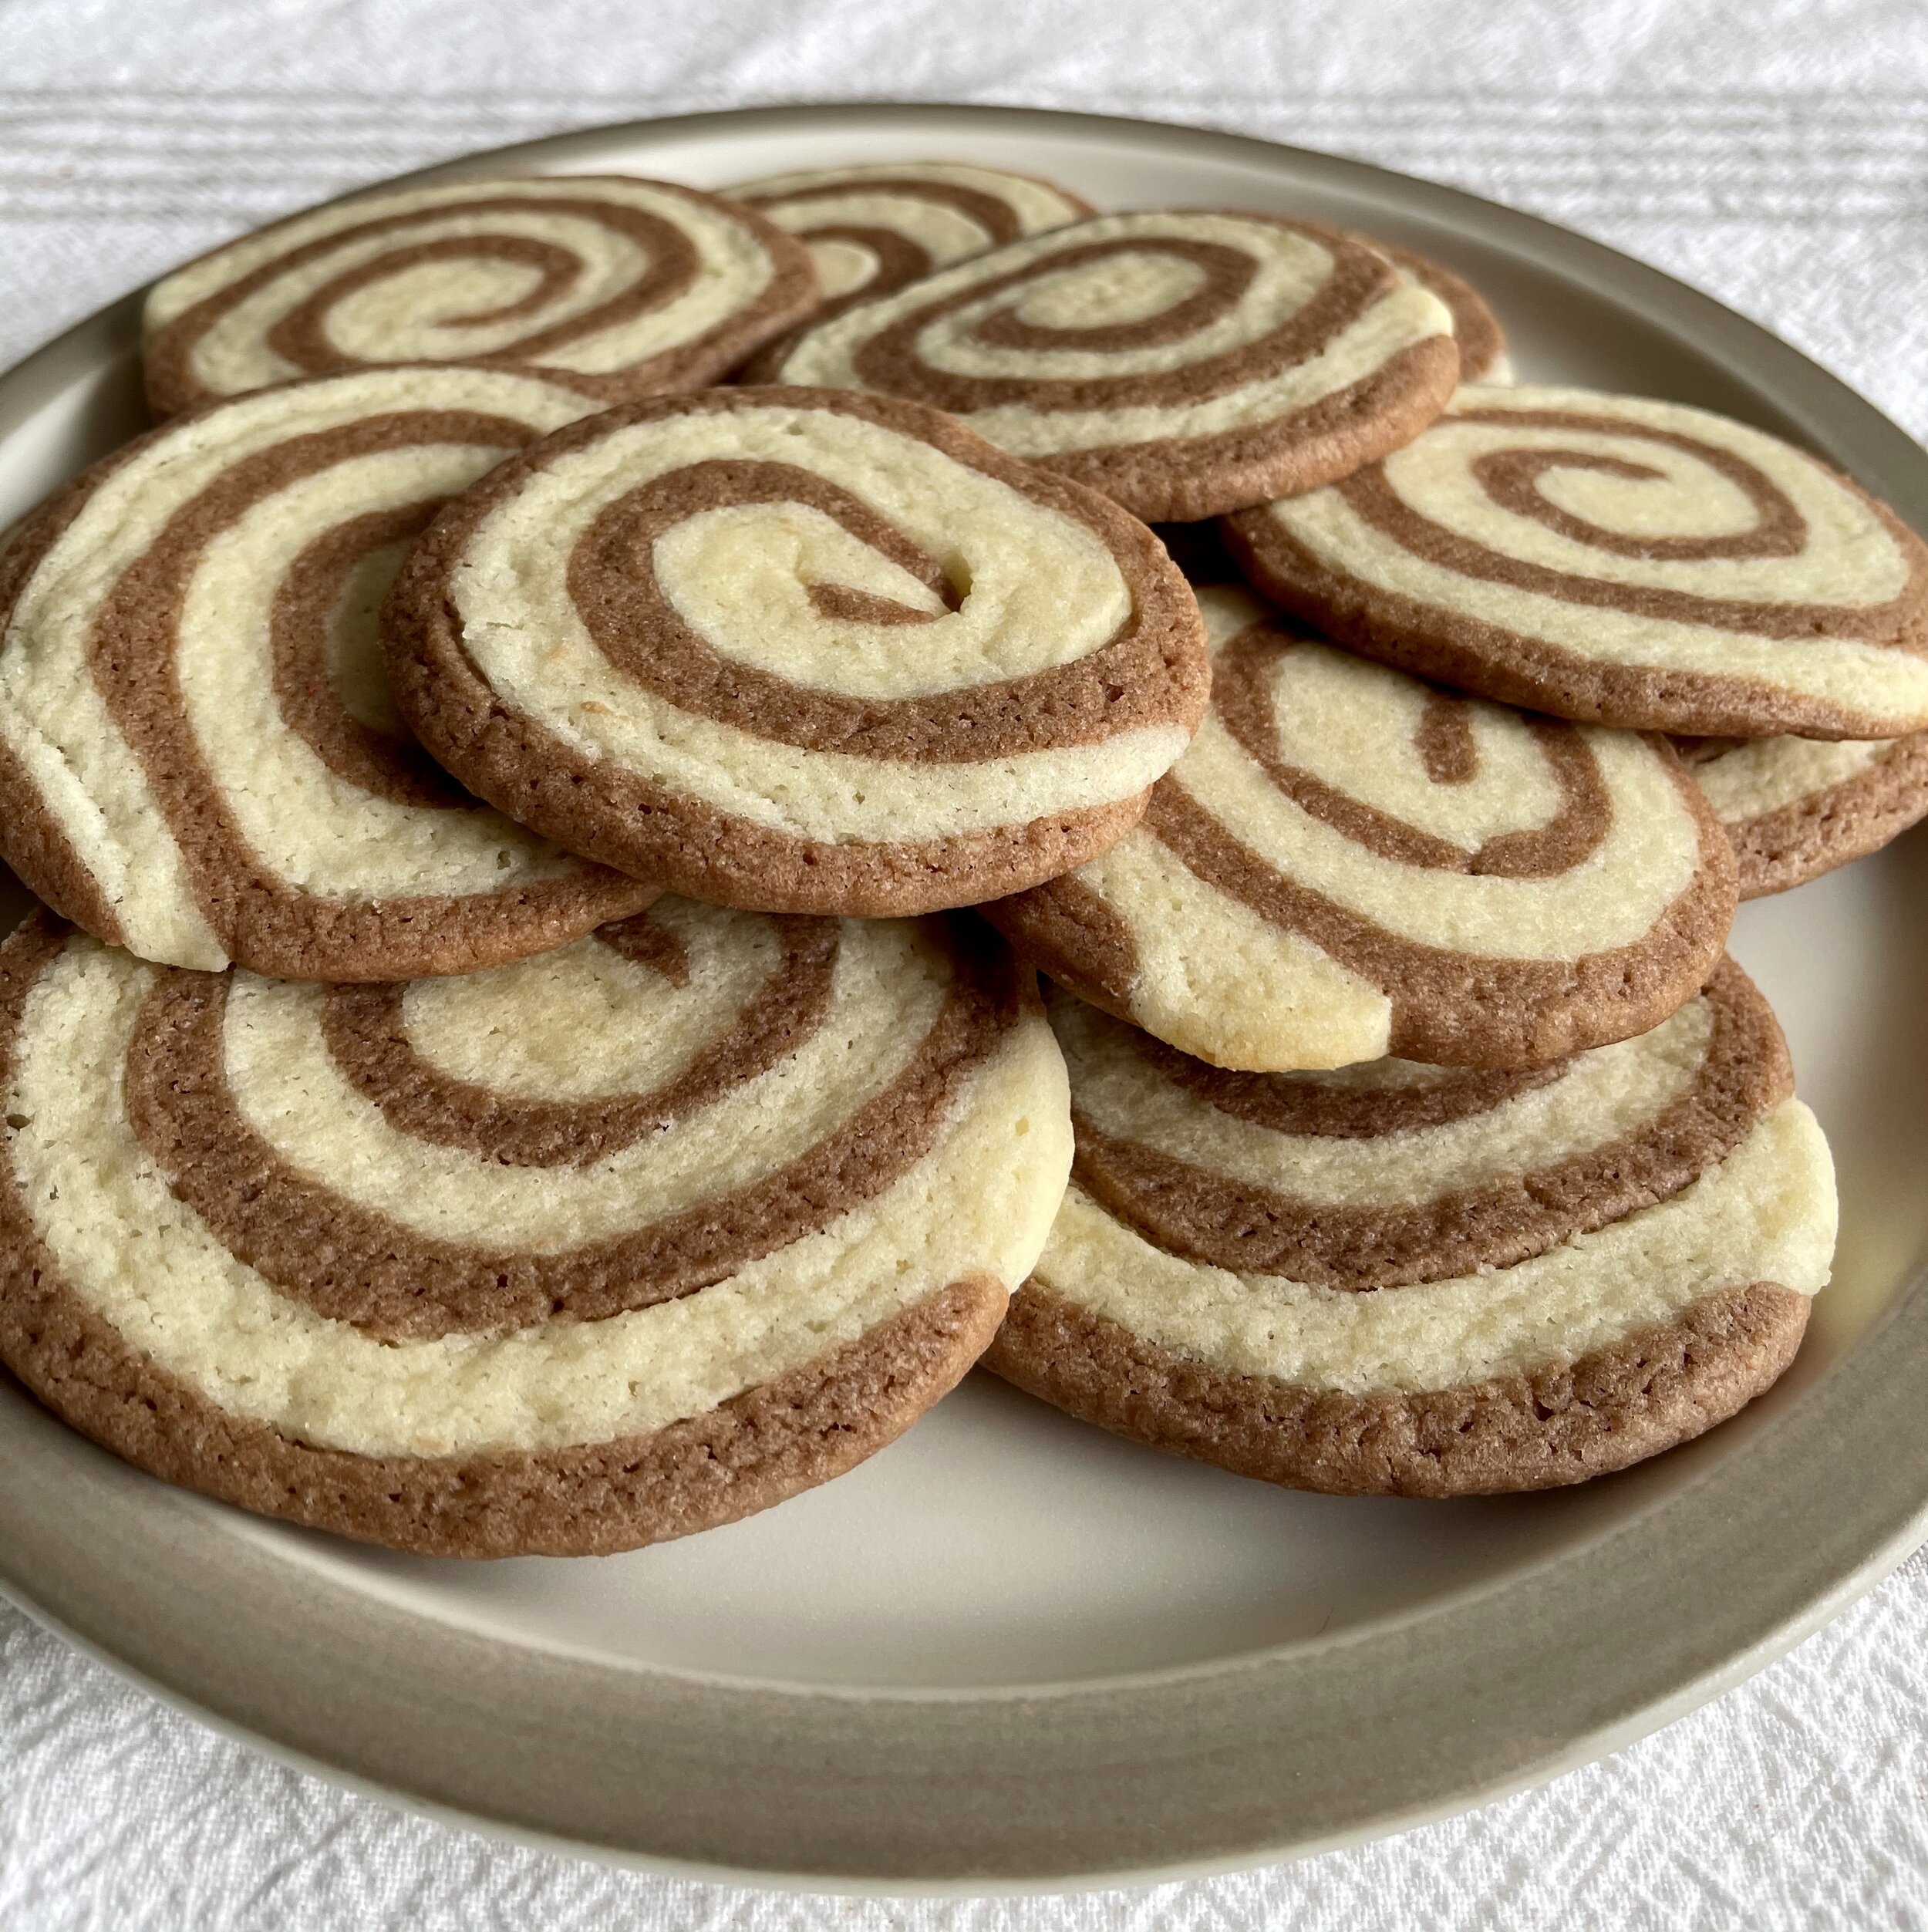
Chocolate and Vanilla Pinwheel Cookies
Grandma and I used to bake these Pinwheel Cookies together when I was growing up (one of many things we used to bake together!) She’d tell me how her mother made these cookies ever year for her.
It’s been a long time since I’ve eaten one of these. Feeling nostalgic, I thought I’d try baking these once more, as the first entry into what will surely be a holiday baking spree these next few weeks.
This recipe makes about 20-22 cookies, but feel free to double it if you’re giving some to family and friends (or if you’re really in the mood for some cookies, I’m not here to judge) The whole process takes a couple of hours, though most of that time goes to chilling the dough - actually rolling the dough and cutting the cookies doesn’t take too long and is easy!
See *Notes for more important tips/clarifications.
Backstory:
Growing up, I spent a lot of time at my Grandma and Grandpa’s house. Whenever I did, my Grandma and I would play games, watch movies and, of course, bake. These Pinwheel Cookies were one of my favorites! Not being able to go back home this holiday, I figured I’d bring a little bit of home to LA - and these cookies were at the top of my list. And so, with the help of my trusty sidekick/husband, we got started. I promise you, they’re worth it. I was stressed about them not looking “perfect” but the imperfect pinwheel shape is what makes them special. Hope you enjoy!
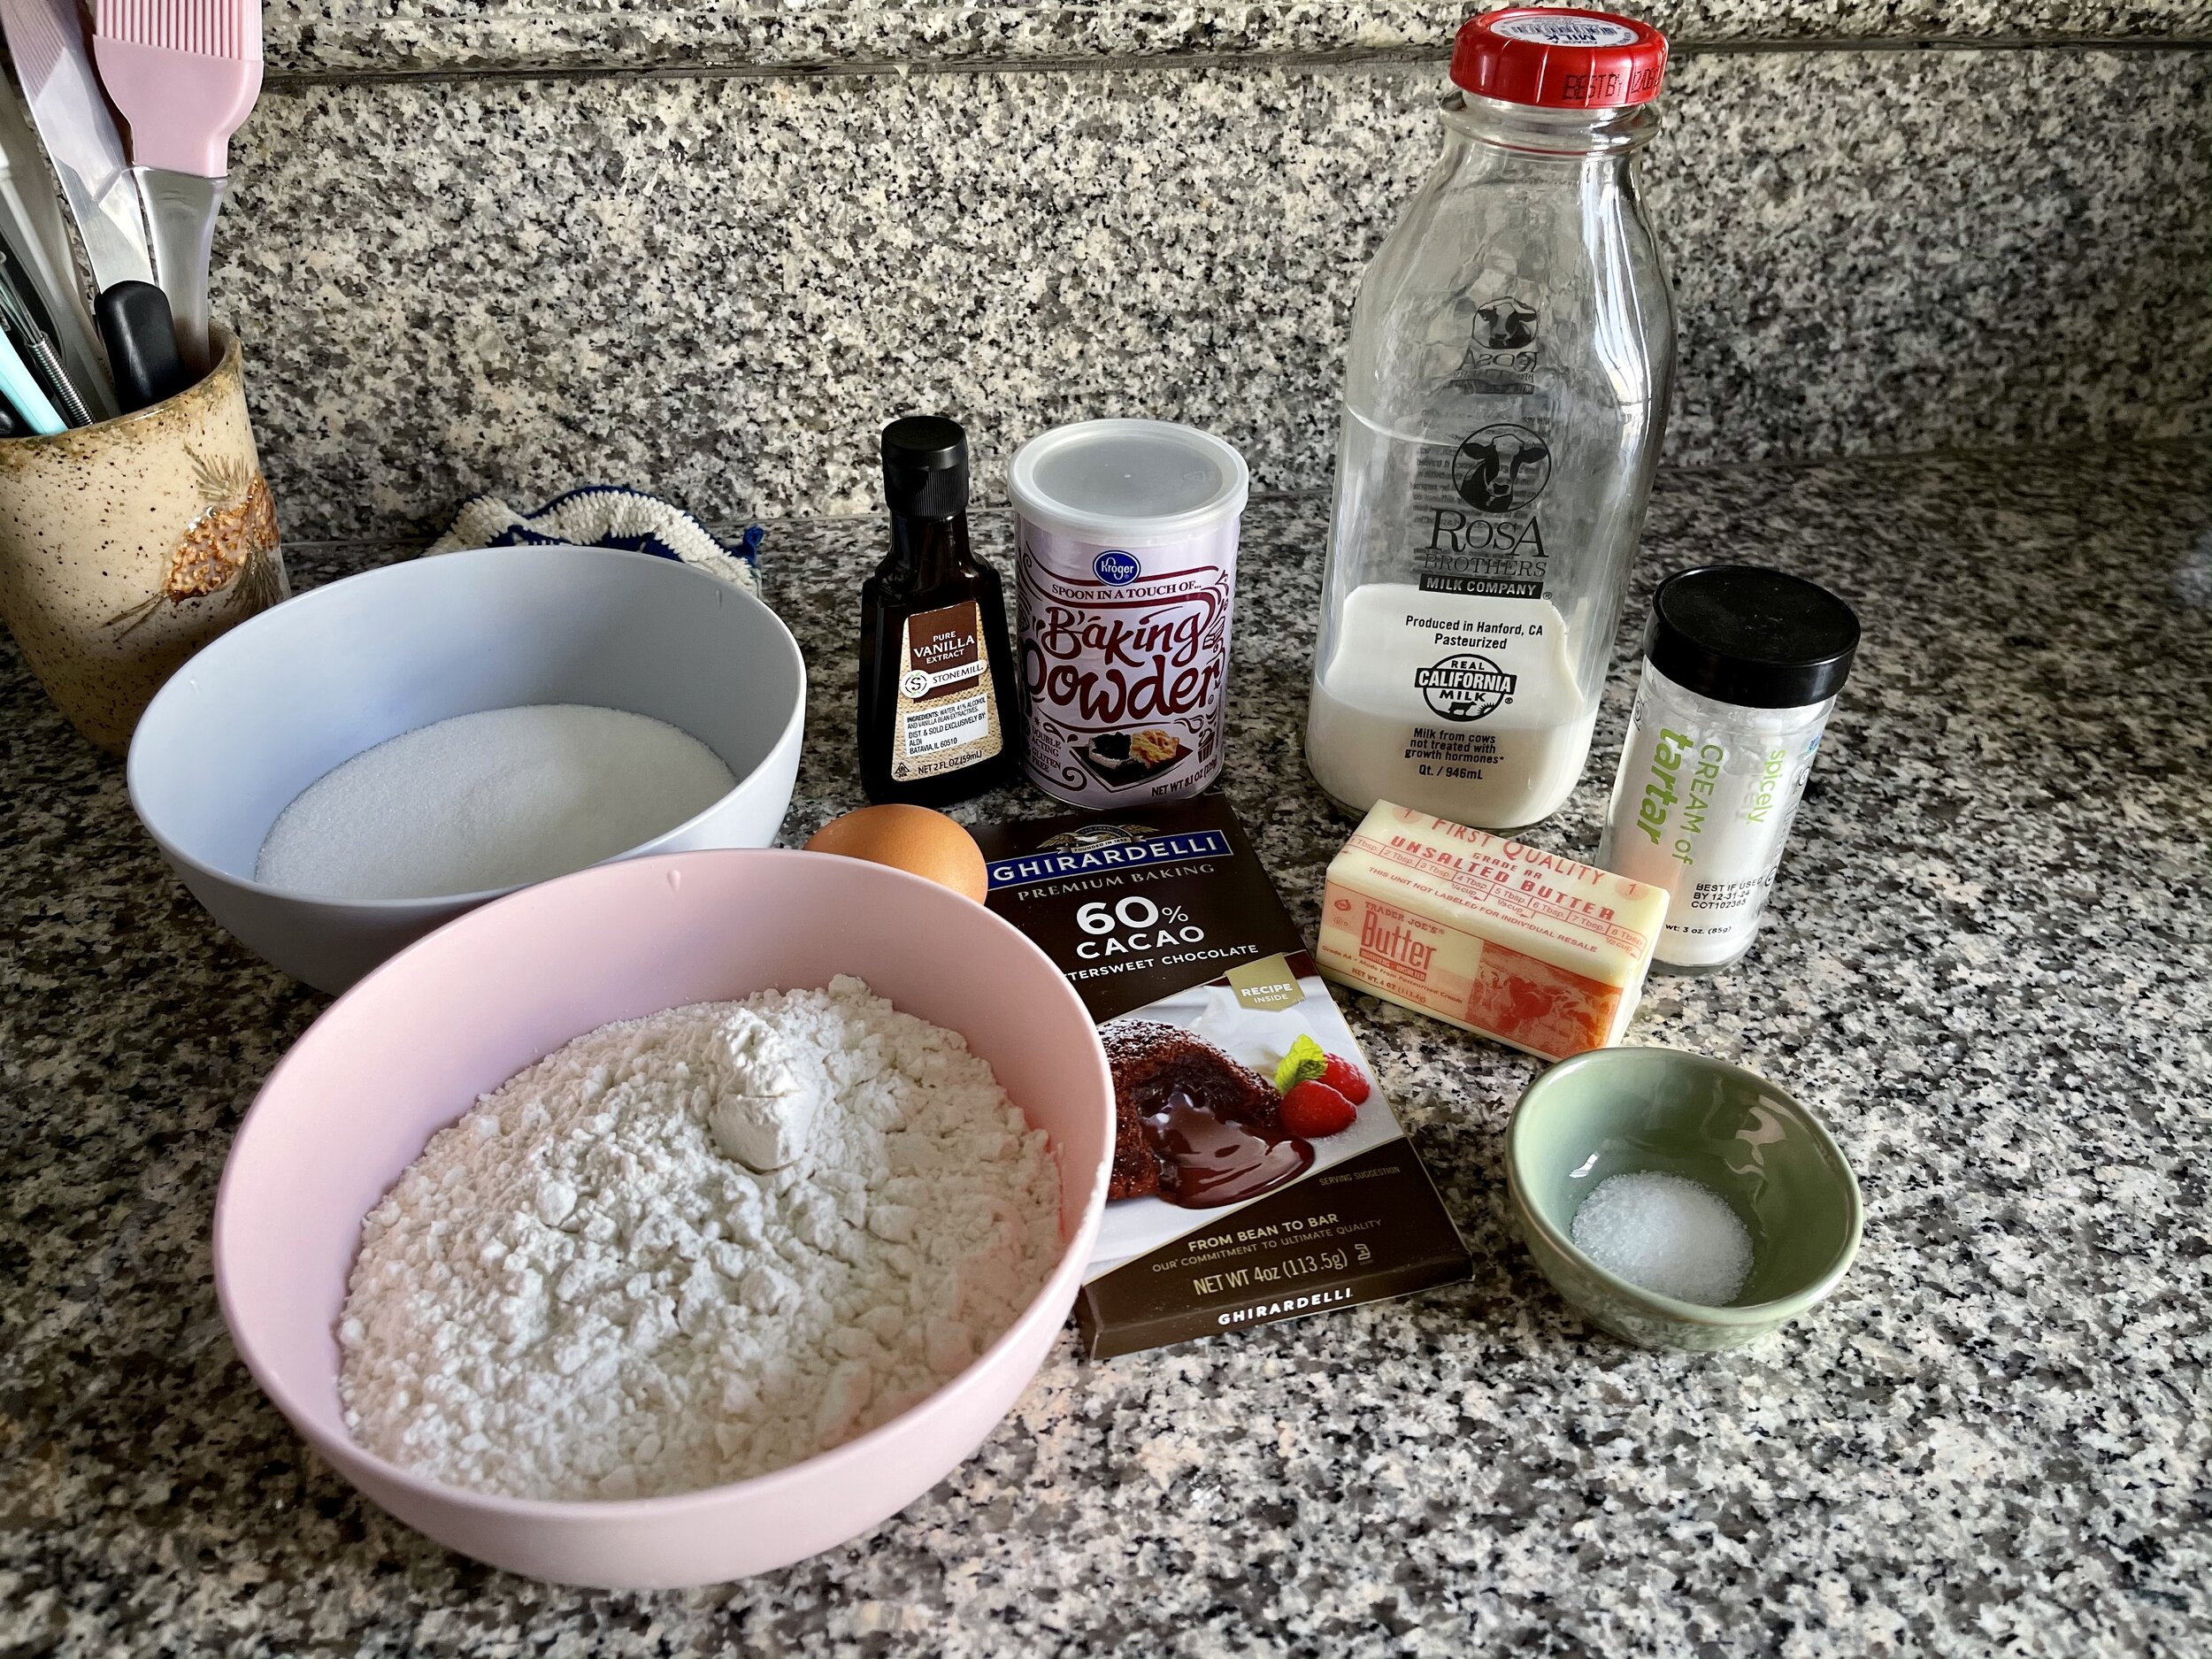
Ingredients:
1 cup granulated sugar
1/2 cup butter, at room temperature
1 egg, at room temperature and beaten
2 tbsp whole milk
1 tsp vanilla extract
2 cups all purpose flour
2 tsp baking powder
1/2 tsp fine sea salt
1-2 squares of unsweetened chocolate, melted

Notes*
When making just one batch (per this recipe), you’ll only have one portion of vanilla and one portion of chocolate dough to roll out (before layering and rolling into the log). If you’re making a double batch, divide each dough into two parts each before rolling out (so you’ll end up with two logs).
I used about 1 and 1/2 squares of unsweetened chocolate, but you can use anywhere from 1-2 squares depending on how chocolate-y you want the dough.
When rolling the vanilla and chocolate dough out (before laying one sheet of dough on top of the other), you can also roll each into a rectangle shape, or really any shape that will allow you to roll the final dough into a log.
If you have any scraps, just roll them into balls and bake a few mins longer. They’re not “pinwheels” but they still taste yummy!
Process:
Using a stand or hand mixer (in a large bowl), cream the butter and sugar for 2-3 mins on medium speed, or until light and fluffy, scraping the sides of the bowl as needed. Add the beaten egg and mix until incorporated. Add the milk and vanilla and mix until combined.

2. Next, you can either add the dry ingredients one at a time into the wet mixture, or whisk the dry ingredients together in a separate bowl, then add to wet ingredients and beat on medium-low speed until the dry ingredients are all mixed in. Scrape the bowl down as needed. Finish mixing with a wooden spoon if you need to.

3. Divide the dough into two parts. I used a food scale to ensure the dough was divided evenly. Place each portion in a large enough bowl to hold the batter. Melt the chocolate and mix it into one of the dough portions. Cover and chill the vanilla and chocolate dough in the fridge for about 2 hours.

4. After chilling the vanilla and chocolate dough, it’s time to roll each one out. Remove them (one at a time) from the fridge and lightly dust a work surface with flour and roll each dough into an oval shape (my Grandma’s recipe says “oblong”) that’s about 1/4 to 1/2 inch thick. If the dough starts to rip on the edges, just push back together with your fingers. Once you’ve rolled each dough into roughly the same shape/size, place one on top the other (doesn’t matter which is on top) and roll into a log (again, pushing together any cracks). I used a bench scraper as I was rolling the log, to help the dough along. Wrap the dough log in plastic wrap and chill in the fridge for another 2 hours (you can also freeze at this point overnight to bake the next day, or for about 1 month).


5. Preheat oven to 350 degrees Fahrenheit. Once the log of dough is done chilling, take it out of the fridge and dust a work surface with flour again. If the log is flat on the bottom from chilling in the fridge, just roll it gently along the counter. Using a sharp knife, slice into 1/4 to 1/2 inch pieces.

6. Place the cookie pieces on parchment lined (or greased) half sheet trays, with about 8 cookies per baking sheet, placed about 2 inches apart. Bake for 8-10 minutes and cool on the pan on a wire rack, or transfer cookies to a parchment lined rack to cool. Enjoy!